
FASHION
Framed Beauty: Elevating Walls with Style and Soul

Elevating Walls with Style and Soul Framed beauty has long been a cornerstone of interior design, offering an artistic touch that turns bare walls into expressive spaces. From minimalist photo frames to curated gallery walls, the way we decorate our vertical spaces speaks volumes about our personalities, values, and lifestyle
The Emotional Power of Wall Decor
Wall décor is more than just a design element; it’s a storytelling device. Whether it’s a framed wedding photograph, an abstract canvas, or a vintage travel poster, these pieces add emotional depth to a room. Homeowners often seek ways to reflect identity and personal memories through their walls, turning what could be generic living rooms or hallways into meaningful sanctuaries.
Psychologically, curated art and personalized arrangements contribute to emotional well-being. Visual stimuli in the form of art and frames provide a sense of stability, nostalgia, and even daily motivation. Wall décor choices often tap into our subconscious—highlighting favorite colors, inspirational themes, and even cultural heritage.

Frames: The Unsung Heroes of Interior Design
While the artwork or photograph takes center stage, the frame is the quiet structure that elevates its presentation. Frames can shift the tone of an entire room, whether you opt for rustic wood, sleek metal, or ornate gilded edges. The material, color, and style of a frame can either accentuate the surrounding décor or create a bold contrast for visual intrigue.
Choosing the right frame style is essential. For instance:
- Floating frames offer a modern look ideal for canvas prints.
- Shadow boxes are great for showcasing 3D items like souvenirs or keepsakes.
- Gallery-style frames create uniformity, making them perfect for multi-photo arrangements.
Interior designers frequently emphasize framing as a bridge between the artwork and the room’s broader aesthetic—tying in textures, color palettes, and design themes.
Gallery Walls: A Personalized Showcase
Gallery walls have surged in popularity thanks to platforms like Pinterest and Instagram, where DIY home makeovers inspire millions. A gallery wall allows you to curate a mix of photographs, prints, typography, and even objects like mirrors or clocks, transforming a simple wall into an eye-catching statement.
Key elements of successful gallery walls include:
- Cohesive theme or color palette (e.g., monochrome, coastal, bohemian)
- Balanced layout (symmetrical vs. salon-style arrangements)
- Mix of sizes and frame types to add depth and visual interest
People often experiment with various layouts on the floor before hanging them up. Some even use painter’s tape to outline frame positions on the wall. The versatility of a gallery wall makes it ideal for living rooms, staircases, hallways, or even bathrooms.
Material Matters: Choosing the Right Elements
Frames and wall décor materials influence both the aesthetics and durability of your display. Wood frames offer warmth and rustic charm, while metal frames bring a modern, industrial edge. Acrylic frames are lightweight and sleek, ideal for minimalist or contemporary interiors.
Wall décor isn’t limited to flat surfaces. Consider incorporating:
- Macramé hangings for boho vibes
- Metal sculptures for modern-industrial themes
- Tapestries and woven art to introduce texture and cultural patterns
Mixing different materials—like pairing canvas art with metallic frames—can result in a more dynamic and layered design.
Using Wall Decor to Define Spaces
Wall décor also serves a functional purpose: visually dividing or defining space. In open-concept homes, strategic use of art can help distinguish a reading nook from a dining area or a hallway from a home office. Mirrors, often framed artistically, can enlarge the perception of space and reflect light in darker corners.
Even in small apartments, a well-placed piece of wall art above a console table or bed can anchor the space, making it feel intentional and grounded.
Cultural and Seasonal Influences in Wall Styling
Cultural motifs and seasonal themes also influence the world of wall décor. Scandinavian homes often favor minimalism with clean frames and monochrome prints, while Mediterranean interiors embrace rich colors and ornate tile patterns.
Seasonal décor is becoming increasingly popular. People switch out prints and frames to align with holidays, seasons, or moods—using warmer tones and textures in the winter and airy pastels in spring. Temporary wall décor options like peel-and-stick decals, fabric banners, and paper garlands make it easier to adapt and refresh spaces without damage.

Eco-Friendly and Sustainable Wall Decor Trends
As sustainability becomes a core concern in interior design, many are turning to eco-friendly materials and second-hand finds. Reclaimed wood frames, upcycled art pieces, and vintage posters not only reduce environmental impact but add character and history to your home.
Handcrafted items from local artisans, ethical brands, and fair-trade markets are gaining traction. Not only do these options support small businesses, but they also provide one-of-a-kind pieces that mass-market stores can’t replicate.
Tech Meets Decor: The Rise of Digital Frames
In an age where digital innovation touches every part of life, wall décor isn’t exempt. Digital photo frames now allow users to rotate images via apps or cloud storage. These sleek devices blend seamlessly into modern homes and are especially great for those who love changing their visual stories often.
Smart LED frames can even display art from global galleries, adjust brightness based on room lighting, and sync with your smart home system. It’s a marriage of art and technology that reflects modern lifestyle trends.
FAQs: Framed Beauty and Wall Décor
Q1: What’s the best way to create a gallery wall without damaging the paint?
Use removable adhesive hooks or strips that are strong enough for the frame’s weight. You can also use a gallery hanging system if you’re a renter.
Q2: How do I choose artwork that matches my décor style?
Look for art that complements your existing color palette, furniture style, and personal aesthetic. Abstract prints work well in modern homes, while nature scenes or vintage posters suit more traditional settings.
Q3: Are digital frames worth it for wall display?
Yes, especially if you enjoy frequently changing the displayed images. They’re convenient, modern, and can hold hundreds of photos in a single frame.
Q4: What is the ideal height to hang wall art?
A common rule is to hang artwork so the center is around 57-60 inches from the floor—roughly eye level. Adjust slightly based on furniture height.
Q5: Can I mix frame colors and materials on one wall?
Absolutely. Mixing frames can add texture and interest. Just keep some element consistent—like color family, layout balance, or theme—to avoid visual chaos.
Conclusion
Framed beauty lies in more than perfect symmetry or curated aesthetics—it’s about capturing moments, expressing identity, and crafting soulful surroundings. Wall décor invites you to be both curator and artist, shaping your environment one frame at a time. Whether it’s a digital photo slideshow, a vintage postcard collage, or a handcrafted textile piece, the story your walls tell can elevate not just the space, but the spirit of your home.

Good pants for men are all about finding the perfect balance between style, comfort, and practicality. It’s not just about looking good; it’s also about feeling good and being able to move freely. For men with pants, this means considering factors like fabric, fit, and features like pockets and waistbands.
Fabric: The Foundation of Comfortable Pants
The type of fabric used to make pants can greatly impact how comfortable they are to wear. Cotton, polyester, and wool are popular choices, each with their own pros and cons. For example, cotton is breathable and soft, but may not be as durable as polyester or wool. Men with pants who prioritize comfort may want to look for pants made from a cotton-rich blend.

Fit: The Key to Stylish Pants
A good fit is essential for stylish pants. Pants that are too tight or too loose can be unflattering and uncomfortable. Men with pants should consider their body type and personal style when choosing a fit. For instance, slim-fit pants are great for those with a lean build, while relaxed-fit pants are better suited for those with a more athletic build.
The Pros and Cons of Different Types of Pants for Men
From jeans to dress pants, there are many different types of pants to choose from. Each has its own advantages and disadvantages. For example, jeans are versatile and comfortable, but may not be suitable for formal events. Dress pants, on the other hand, are perfect for dressing up, but may not be as comfortable for everyday wear.
“I love wearing linen pants in the summer – they’re so breathable and comfortable, even on the hottest days.”
Men with pants who want to stay stylish and comfortable should consider the occasion and dress accordingly. Whether you’re heading to the office or a night out on the town, there’s a pair of pants to suit your needs.
Features to Consider: Pockets, Waistbands, and More
When it comes to pants, it’s not just about the fabric and fit – it’s also about the features. Men with pants should look for pants with functional pockets, a comfortable waistband, and other details that enhance the overall wearing experience.
FAQs
Conclusion
Q: What are the most comfortable pants for men to wear?
A: The most comfortable pants for men to wear depend on personal preference, but many men swear by cotton or linen pants for their breathability and softness.
Q: How do I choose the right fit for my pants?
A: To choose the right fit, consider your body type and the occasion. For example, slim-fit pants are great for formal events, while relaxed-fit pants are better suited for casual gatherings.
Q: Can men with pants wear jeans to formal events?
A: While jeans can be dressed up, they’re generally not suitable for formal events. Men with pants may want to opt for dress pants or trousers instead.
Q: What’s the best way to care for my pants?
A: To keep your pants looking their best, wash them in cold water, hang them to dry, and avoid over-drying or over-washing.
Men with pants, it’s clear that there’s a lot to consider when it comes to style, comfort, and practicality. By understanding the basics, considering different types of pants, and looking for features that enhance the wearing experience, men can find the perfect pair of pants to suit their needs.

Tongue piercing is a relatively quick process, but it’s crucial to find a reputable and experienced piercer to minimize the risks.
Choosing the Right Piercer
When selecting a piercer, look for someone who is:
- Experienced: Check their portfolio and ask about their experience with tongue piercings.
- Hygienic: Ensure they follow proper hygiene and sanitation procedures.
“I was nervous about getting my tongue pierced, but my piercer was amazing. They explained everything and made me feel at ease.”

Aftercare and Healing
Proper aftercare is crucial for a smooth healing process. Here are some tips to keep in mind:
- Rinse with salt water: Soak your tongue in a salt water solution several times a day to promote healing.
- Avoid irritants: Steer clear of spicy or acidic foods, as well as smoking and drinking.
Healing Time
The healing process for a tongue piercing typically takes 4-6 weeks. During this time, you may experience some discomfort, swelling, and bleeding.
FAQs
Q: Is tongue piercing painful?
A: Yes, tongue piercing can be painful, but the pain is usually temporary and manageable.
Q: Can I get a tongue piercing if I have a sensitive tongue?
A: It’s not recommended to get a tongue piercing if you have a sensitive tongue, as it may be more prone to irritation.
Q: How do I care for my tongue piercing?
A: Proper aftercare involves rinsing with salt water, avoiding irritants, and keeping the area clean.
Q: Can I get a tongue piercing if I have dental work?
A: It’s best to consult with your dentist or piercer to determine if a tongue piercing is safe for you.
The Pros and Cons of Tongue Piercing
As with any form of body modification, there are pros and cons to consider.
Pros:
- Self-expression: Tongue piercing can be a unique form of self-expression.
- Aesthetic appeal: A tongue piercing can be a stylish and attractive addition to your appearance.
Cons:
- Pain and discomfort: Tongue piercing can be painful, and the healing process can be uncomfortable.
- Risks and complications: As with any piercing, there are risks of infection, swelling, and other complications.
Conclusion
Tongue piercing is a personal decision that requires careful consideration. By understanding the process, risks, and aftercare involved, you can make an informed decision that’s right for you.
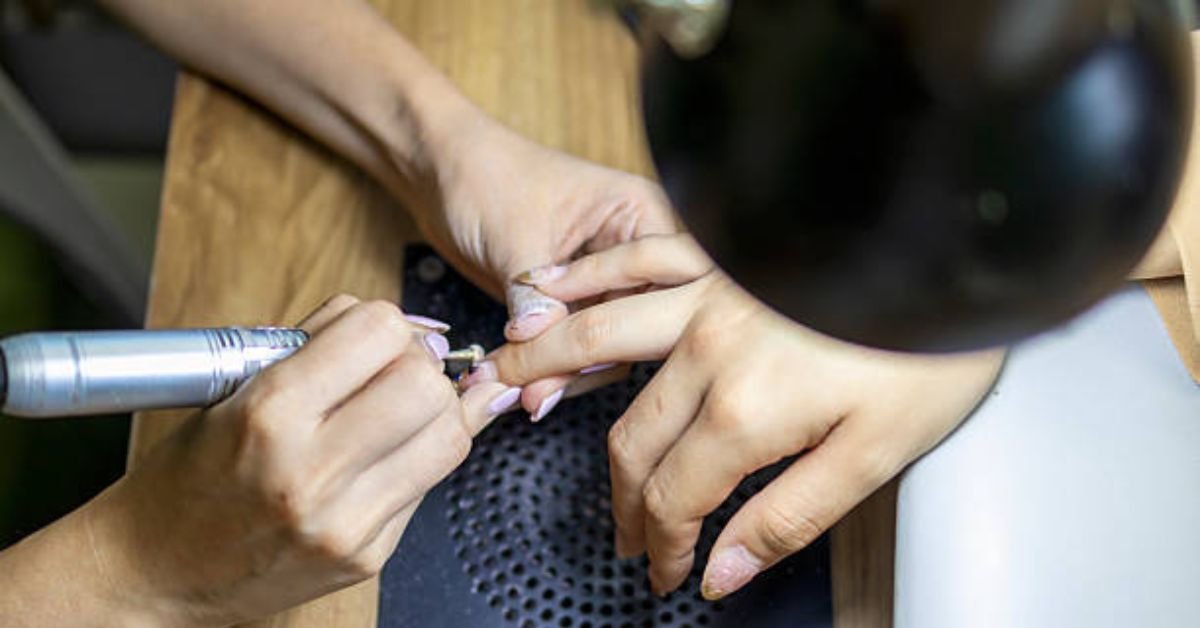
How to remove acrylic nails without damaging your natural nails Removing acrylic nails can be a bit of a challenge, but with the right techniques and tools, you can do it safely and effectively at home. In this article, we’ll walk you through the process of how to remove acrylic nails, and provide you with some valuable tips and tricks along the way.
Understanding Acrylic Nails and Their Removal
Before we dive into the removal process, let’s take a closer look at what acrylic nails are and how they’re applied. Acrylic nails are a type of artificial nail enhancement made from a mixture of liquid monomer and powder. They’re applied on top of your natural nail to add length, strength, and beauty.

The Risks of Removing Acrylic Nails
Removing acrylic nails can be a bit tricky, and if not done correctly, it can cause damage to your natural nail. Some common risks associated with removing acrylic nails include:
- Lifting or tearing of the natural nail
- Damage to the nail bed
- Infection or irritation
Preparing for Removal
Before you start removing your acrylic nails, it’s essential to prepare your nails and the surrounding skin. Here are a few steps to follow:
Soften the Adhesive
To make the removal process easier, you’ll need to soften the adhesive that holds the acrylic nail in place. You can do this by soaking your fingers in a bowl of warm water mixed with a small amount of oil or acetone.
Protect Your Skin
To prevent irritation or dryness, apply a layer of petroleum jelly or cuticle oil to the skin around your nails.
The Removal Process: A Step-by-Step Guide
Now that you’re prepared, it’s time to start removing your acrylic nails. Here’s a step-by-step guide to follow:
Step 1: File the Top Layer
Use a nail file to gently file the top layer of the acrylic nail, being careful not to file too aggressively and damage the natural nail.
Step 2: Soak the Nail
Soak a cotton ball or pad in acetone and place it on top of the nail. Wrap the finger with aluminum foil to help the acetone penetrate the adhesive.
Step 3: Wait and Repeat
Let the acetone soak into the adhesive for about 15-20 minutes. Repeat the process until the acrylic nail starts to loosen.
Step 4: Gently Pry Off the Nail
Once the acrylic nail is loose, use a cuticle pusher or orange stick to gently pry it off. Be careful not to force it, as this can cause damage to the natural nail.
“I was able to remove my acrylic nails at home using the acetone soak method. It took a few attempts, but it was worth it to avoid a trip to the salon.”
Aftercare and Tips
After removing your acrylic nails, it’s essential to take good care of your natural nails to prevent damage or infection. Here are a few tips to follow:
- Moisturize your nails and cuticles to keep them hydrated
- Avoid using harsh chemicals or detergents
- Keep your nails clean and dry
FAQs
Q: How long does it take to remove acrylic nails at home?
A: The removal process can take anywhere from 30 minutes to an hour, depending on the type of adhesive used and the number of nails being removed.
Q: Can I use nail polish remover to remove acrylic nails?
A: No, nail polish remover is not strong enough to remove acrylic nails. You’ll need to use acetone or a specialized acrylic nail remover.
Q: Will removing acrylic nails damage my natural nails?
A: If done correctly, removing acrylic nails should not damage your natural nails. However, if you’re not careful, you can cause lifting or tearing of the nail.
Q: How often can I remove and reapply acrylic nails?
A: It’s recommended to give your natural nails a break between applications to prevent damage or weakening. Try to limit your acrylic nail applications to every 2-3 weeks.
Conclusion
Removing acrylic nails at home is a relatively simple process that requires some patience and care. By following the steps outlined in this guide, you can safely and effectively remove your acrylic nails and keep your natural nails healthy and strong.
-

 HEALTH9 months ago
Gold Potato Calories: What’s Really on Your Plate?
-

 BLOG9 months ago
Flattering Cuts for Diamond-Shaped Faces
-

 TECH9 months ago
Smart Tools for Special Education Success
-

 FASHION9 months ago
Shine On: Clean Silver Naturally
-

 BUSINESS9 months ago
Beyond the Poké Ball: Inside Pokémon Center Japan
-

 BUSINESS9 months ago
Tower Loan Uncovered: What You Need to Know Before You Borrow
-

 ENTERTAINMENT9 months ago
Panem Reignited: A New Chapter in the Hunger Games Saga
-

 ENTERTAINMENT9 months ago
Matchday Spotlight: Today’s Must-Watch Football Showdowns